Hello there friends! If you've checked out my recent posts, you'll notice that I've got a common theme going - Craft Project Central! Well, if you're wondering what that might be, it's a great site where you can get a 10 fantastic and fun Stampin'Up! crafting ideas when you subscribe for the month. I am honored and thrilled to be a guest designer this month and the project I came up with is this Gingham Purse and Card Set:
This pretty little purse and monogram card set makes the perfect personalized gift for someone special. The new school year is starting and teachers love having cards on hand. How about that special co-worker or neighbor! Make several to have on hand and customize the monogram when ready to give! Makes a fun class or club project as well!
I was very excited to showcase the Bow Bigz die - so fun to use and a great die to have on hand for numerous occasions! And, I have been intrigued with Monograms lately, so I decided to create a monogram set. This particular one was inspired by my cousin's visit from New Zealand. This is her first time to the United States, so I wanted to give her something hand crafted from me :) If you'd like all the details of this project, I definitely encourage you to subscribe to the August projects over at Craft Project Central! Enjoy!
Showing posts with label Gift Card Holder. Show all posts
Showing posts with label Gift Card Holder. Show all posts
Saturday, August 31, 2013
Thursday, November 29, 2012
Great things come in {cute} handmade packages
Hi all! How are you? I am popping in with a quick post of a fabulous idea that I had to CASE from Qbee's Quest! How cute is this box! Here's a full look of the outside:
And wait til you see the inside....
Isn't that so clever?! It's a hinged box that measures 3" x 5" and is 1" deep. I love the little pop-up for the gift card! I am so glad I stumbled across Brenda's post - she has a step-by-step tutorial on her blog, so it makes this project so easy peasy, you'll want to make a bunch! I know I am!! Plus there's even room to add some yummy candy or a nice tube of lipstick. Hope you liked this case!
Here are the supplies I used:
{Penguin Gift Card Box}
*Cardstock: Cherry Cobbler, Be of Good Cheer DSP, Very Vanilla
*Stamps: No Peeking
*Inks: Cherry Cobbler
*Accessories: Window Framelit dies, Festive Paper Piercing Pack, Big Shot, Gumball Green Stitched Satin Ribbon, dimensionals, Simply Scored board, Decorative Label punch, Paper trimmer
Have a great day and I'll see you guys soon. I think I've bitten by the inspiration bug, so I'm hoping to post a few more things this week! Bye for now.

Thursday, November 11, 2010
cookin' up a Gift Card Holder
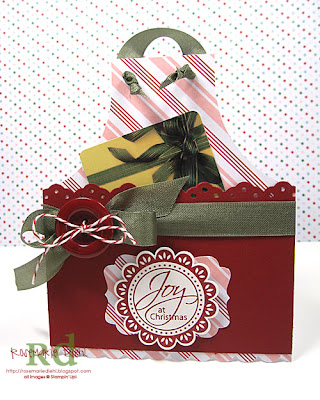
Hey there peeps! My card share today is this cute little apron that was totally CASED from Ashley Cannon Newell's adorable recipe card post. Since her apron holds a 3 3/4" x 4 3/4" finished recipe card, I had to size mine down so that the my Apron's starting cardstock size was a cardfront size - 4 1/4"x 5 1/2". It's the perfect size to fit a gift card for that chef or baker in your family {in my home, that would be my personal chef - my dear hubs!} Here's what it looks like with the gift card:
So let me tell you about the template that I had to make. I carved out the shape by using the largest oval on the Ovals #2 Bigz die. I used the oval arc shape to create my curved sides of the apron. So, for my template, you'll want to use a pencil to mark off 1 1/4" on either side of the top edge of the cardstock (for the neck), and on the left and right sides, mark off 3 1/4". Then using the large oval die, place it so that your hash marks line up from the top edge to the side, then trace the arc from edge to edge. Do the same for the other side, and trip these pieces out. Now you should have your apron template! For the front panel, cut a 3 1/4" x 4 1/4" piece of cardstock. Next, use the eyelet border punch on the 4 1/4" edge to create your border. For the bottom of the apron, I used the scallop border. All you have to do is embellish with the stamp and ribbon and you're done! Wasn't that easy? Once you have the template, it's a breeze to make a bunch of these! Enjoy!
Have a great day and thanks for peeking in!

Subscribe to:
Posts (Atom)


