Pages

Wednesday, September 29, 2010

{spooky} fun for World Cardmaking Day

 Hi there!  Did you all know that World Card Making Day is coming up this weekend?  It's actually on Sat, Oct 2nd, but I'm celebrating on Sun, Oct 3rd!  Wanna come?  If you're local to Southern CA in the Torrance/South Bay area, feel free to send me an email and I'll give you all the location details!  It's going to be from 2-4 pm on Sunday, October 3rd.  We'll be making these fun Halloween projects:
Don't the favor and card look wicked cool? {heehee - that's the stamp set name!}  Would love to meet some of you guys if you can make it!  Remember, all you need to do is send me an email and I'll give you the info.

It's getting late for me, so I'm gonna call it a night.  Have a great one!

Tuesday, September 28, 2010

want 12 weeks of crafty Christmas projects?

Hi there peeps!  Are you interested in getting weekly holiday project ideas with detailed instructions and a supply list directly in your inbox?  Well, this year I'm offering a special holiday segment of 12 crafty Holiday Projects in 12 weeks, exclusive to my Newsletter subscribers.  If you're not already on my Newsletter list, you can sign up (it's free) by subscribing to my Newsletter in the right column of my blog.  The box looks like this in the right column, halfway down my blog:
So, in addition to my newsletters, my dear subscribers will get the Week 1 Project tomorrow, September 29th!  Don't miss a project and sign up today.  Did I mention, it's free? :)  These projects won't be shown on my blog, so if you wanna see, make sure you're signed up!  Here's a teeny tiny snippet of the first project, just to give you an idea:

Look interesting?  I think you'll like it.  That's all I'm gonna tease you with.  Have a great day!

Monday, September 27, 2010

2S4Y Just for You

Hi all!  How cute are these guys!!! Too stinkin cute, don't you think? Hope you guys had a great Monday.  I'm running a bit behind on my Monday post, so I appreciate you guys being patient with me. I had fun making my card from Kazan's cool and edgy sketch created for this week's 2S4Y challenge.  Here's a peek at the sketch:
Isn't it pretty?!  My card was inspired by the cute Robot Buddies stickers from this week's sponsor, EAD Designs.  They are such adorably cute and happy images!  Such a cheery little card! Now, go and check out the fabbie samples at 2S4Y - my fellow DT gals are just amazing.  Hope you'll play along with us! Also note that it's that time of year when Kazan and Laura are looking for new design team members, so if you're interested, definitely check out the last few week's posts! {wink!}

Have a goodie! :)

Saturday, September 25, 2010

embellished with Kindness

Hi there!  Happy weekend, everyone!  I have a fun share today - it's a card I created for the Embellish Challenge Background Challenge.  For this round, you need to use the colors in the challenge AND create a stamped background.  I've been wanting to use my Have A Seat stamp set, so this challenge gave me the perfect opportunity!  Here's a look at the colors and challenge inspiration photo:
Now, how fun are the colors - it's one of my new faves lately.  I love the Yellow and Gray together!  So here's my final card for you:

Whaddaya think?  I love the chairs as a background.  So so fun, yet a nice and clean classic look, too.  The quote I used is from the set called Occasional Quotes.  I'm a font girl and I really like it - I think it's pretty and crisp.  Are you wondering what die that scalloped rectangle is?  It's a modified square from the Scallop Square Duo Bigz die.  This was a fun card to put together, and super easy to make, too! Hope you like it!  Here's the recipe:
{Embellished Chairs of Thanks}
All supplies Stampin'Up!
*Stamp Set: Have a Seat, Occasional Quotes
*Cardstock: Whisper White, Basic Gray, Daffodil Delight, Basic Black
*Inks: Basic Gray, So Saffron
*Accessories: Tasteful Trim Bigz XL Die, Scallop Square Duo Bigz Die, Basic Pearls, Corner Rounder punch
Enjoy your weekend.  Toodles for now.

Friday, September 24, 2010

Flashback Friday!

Hi all...me again!  Crazy, I know..3 times in a day!  This is a no brainer though - I saw Amy Tsuruta's  Flashback Friday Challenge and I had to play!  I loved reading about Amy's concept of the Flashback challenge...to bring you back to your creative roots.  I thought it was very clever and a fun introspective look at each individual stamper.  So, the flashback this time is to post your very first challenge card.  Ahh the nostalgia! It was quite a hoot looking through my archives just to find it.  My first ever challenge was the Mojo Monday Challenge, and I have to say I've been bitten by the challenge bug ever since!  Drumroll please....
Presenting my first challenge card:
I remember I created this card for my parent's anniversary! This is from January 2009.  I can't believe I've only been doing challenges since the beginning of last year!  It feels like forever!!  So fun - glad I got to play!  You can check out the deets from my original post here.  What a fun flashback!  You can tell that I don't stray far from my "comfort palette".  If you browse through my blog, you'll see that I have a lot of this color variation in my projects!  Do you find yourself going back to a certain color palette for your projects?  I'd love to hear your thoughts on that.   :)

Thanks for coming by!

are you a fan? I've got a badge for you!

Hi again.  I think I've gotten addicted to creating badges on MDS.  Soo much fun!  So, for those of you, dear blog readers who come visit my blog, this badge is for you!  I would love for you to post it in your sidebars if you like :)  You can post the graphic below or check out the smaller graphic in my sidebar.  Feel free to email me or leave me a comment if you have any questions!
The owl image is too stinkin' cute, I couldn't resist making something out of him.  I hope you like it.  I created the digital graphic using the owl punch, the scallop oval punch, and the bird punch in the MDS tool. It was such a piece of cake to make!  I highly recommend MDS {aka My Digital Studio} to any of you that don't have a digital application yet and are looking to purchase one.  Not only is it super intuitive to use, but it's loaded up with super cute Stampin'Up! images and punches, so you'll be able to make all kinds of things in a snap - from digital graphics, cards, scrapbook pages, albums, and calendars just to name a few.

Anyway, I'm getting carried away!  The main point of this post was to share a badge with you guys - it would truly be an honor for me to have you post on your blogs :) 

Have a fabbie day!

announcing - {this month's} Final Friday Winner!

Hi there blog friends!  Happy Friday!  I've been experimenting with creating digital images on MDS, so I decided to create a badge for my Final Friday Winners.  I found that these are so fun to make!  I created a September Winner badge, so this month's lucky winner will have the option to post this on your blog, if you choose too, of course!  I don't want to leave any of my past blog candy winners out, so for those of you that have won previously, you can post your choice of one of the badges below onto your sidebar :)  Simply right click on your mouse, and "Save Picture As" so you have it on your computer.  Then to post on your sidebar, add it as a picture and you're good to go!
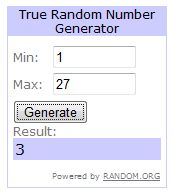
..So, how about we find out who this month's Final Friday Winner is...are you ready?  This month's lucky winner is...
Lucky number 3, who happens to be Regina Mangum!
Congrats, Regina!!!

Thanks to all of you who played along this month!  I had fun reading your comments and I do appreciate those of you that had given me some book recommendations.  Will definitely look into those!  As for my current book club books, I'm currently reading Major Pettigrew's Last Stand for one of them and for the other I'll be reading The Girl With The Dragon Tattoo.  I'll let you guys know how they are!

Have a great day!

Monday, September 20, 2010

Wickedly {Haunted Houses!}

Hey there - just a quick post for you tonight...I wanted to play in the Pals Paper Arts Wicked Halloween Inspired Challenge before the cutoff time!  So here's my pair of Haunted Houses.  You may recognize one of them, which I originally created on this post, but I "spooked" it out a little with my scary friendly ghost!  For the second house I made {the green one}, I shaped my roof with the wide oval punch to flare it out a little, and then also used the Pinking Hearts Trim and finally, embossed it with the Square Lattice embossing folder.  Here's a closer look:

I love the little ghosts that I've seen on a variety of blogs and galleries...very ingenious to use the owl punch upside down!  So, I added one of these cute little guys to haunt this house, too.  Hope you like my haunted houses!  Thanks for popping by!

2S4Y {Joy!}

Happy Monday, blog friends!  It's time for this week's 2S4Y sketch.  I got back in the holiday spirit with this week's sketch.  These fun Christmas Ornaments are from Robin's Fetish, who happens to be this week's sponsor over at 2S4Y.  Wanna see the awesome sketch Laura created this week?
I basically rotated it 180 degrees to come up with this:

I do love this color scheme for Christmas - it's festive in a fresh, alternative way, don't you think?  I had fun dressing up this card with tinsel, buttons, ruffles and a banner, even.  And, I can't seem to get enough of the baker's twine!  Such a fun embellie.  If you've peeked at my last handful of posts, they've been a must have for my cards!  I've been taking angled views of my cards lately, just to give you guys a different perspective.  So here's the parting shot of this card:
Whaddaya think?  Hope you like it!  Here's the recipe:
{Christmas Joy!}
*Stamp Set: Robin's Fetish Christmas Ornaments digistamp
*Cardstock: Kraft, Candy Cane DSP
*Inks: Real Red and Baja Breeze markers
*Accessories: Billboard decorative strip die, Real Red Satin Ribbon, Tinsel Trim, Candy Cane buttons, Silver Fox pearlized accent ink, baker's twine
Hope you guys have a great week!  I appreciate you peeking in today! :)

Sunday, September 19, 2010

yummy eats at the Lobster Festival

We had a great time today at the Lobster Festival at the Ports of Call in San Pedro.  As a matter of fact, I'm still full!  We celebrated my Dad's birthday today and it was quite the eating fest.  The lobsters were yummy!!  Here are a few snaps from our day.
How delicious does this guy look?  He was quite a tasty crustacean.

Here are my folks getting ready to dig in.

And Michael and I with a quick photo op before we started feasting!

Here's a picture with "Flat Daniel" - it's a picture of "Flat Daniel's journey around the world.  If you're wondering who Flat Daniel is, he's the little cutout among the lobster and he happens to be the mascot for one of Michael's cousin's class projects.  The goal is to photograph Flat Daniel in locations he visits as he travels the world in an envelope.  How fun is this project! 

Here's one more pic of Flat Daniel with a view of the Pacific Ocean in the background on this gorgeous day!  We'll probably have Flat Daniel visiting us for the next few days before we send him off to his next destination. 

That's all I got for now. 

Have a goodie!

Fall Foliage Birthday

Hi all!  I just have a quick post today - I'm playing in Dawn's Color Cue #8 challenge and used the colors to create my Dad's birthday card.  Here's a look at colors:
For my card, I used So Saffron, Cherry Cobbler, Old Olive, and Whisper White.  Here's a look at my full card:
Thanks for visiting today!  Gotta go and get ready - we're heading over to the Lobster Fest to celebrate my Dad's birthday today...yum!  I'll share pictures later!

Bye for now.  Have a good one!

Saturday, September 18, 2010

fall time with Colour Q 50 Challenge

Hi there peeps!  Happy Saturday to you.  It's a beautiful day here...finally!  The marine layer has burned off and the sun is peeking through.  I even got my run in already and did some blurfing and stamping.  I was inspired to play in this week's Colour Q challenge with their yummy fall color palette.  You've got a sneak peek of my card up top..what do you think so far?  Aren't those leaves so fun?  I finally broke down and got that Leaves #2 Originals die...and so glad I did!  It's got my creative juices flowing for fall ideas.  Anyway, let me show you what the Colour Q #50 challenge looks like:
I love all these colors together and I think the bell pepper print inspiration is fun, too!  So, for my card, in addition to these colors, I was also inspired by a quilt I've been eying at Pottery Barn:
So I tried to mimic that texture by using the Square Lattice Embossing folder.  Here's a look at my full card:
What do you think?  Does it look quilty to you?  I really do love the colors and the stamp set I used goes so well with it too!  It's called Style Beautiful...such pretty flourishes and designs!  I sponge daubered the edges of each of the rectangles with the Early Espresso ink pad and I think it helps the squares pop a little more.  Here's a closer look:
I also embossed the peach parfait leaf with the Vintage Wallpaper embossing folder. I love how dry embossing instantly dresses up cardstock!  Then, I embellished with a bit of baker's twine and secured iwth a little button...and viola!  My first fall card of the season!  One last look at the card for you:
{Fall time styled beautiful}
*Stamps: Curly Cute, Style Beautiful
*Cardstock: Early Espresso, Very Vanilla, Cherry Cobbler, Peach Parfait
*Inks: Chery Cobbler, Early Espresso, Peach Parfait, Pear Pizazz
*Accessories: Leaves #2 Originals Die, Square Lattice and Vintage Wallpaper Embossing folder, Regals Button, Baker's Twine
 Thanks for visiting. Enjoy your weekend!  Toodles for now ;)

Wednesday, September 15, 2010

a little Santa Mojo

Hey there blog peeps!  It's been a while since I've played in a Mojo Monday...so I couldn't resist after seeing the fun sketch.  Plus, with Santa on my side, who can't have a little mojo?  How do you like my sneak peek?  Isn't Santa looking so jolly?  And there's bells, too!  Here's a look this week's Mojo Sketch 156:
And here's my full card:
I love the Candy Cane DSP I used in the background - looks so happy and cheerful..just like Candy!  I love the baker's twine I'm seeing everywhere...the red and white are perfect for the holidays.  The Santa image is from the SU! set called Jolly Old St. Nick, which I think is perfectly named!  I used the Tasteful Trim Bigz XL die to create my nicely trimmed DSP.  I've gotta say that's one of my favorite new dies of the season.  Here's one last look at the card, just a bit closer for you:
Is this card getting you into the Christmas spirit?  It'll be here before we know it!  Here's the recipe for you:
{Santa's Christmas Mojo}
*Stamp Set: Jolly Old St. Nick
*Cardstock: Real Red, Candy Cane DSP, Whisper White, Crumb Cake, Baja Breeze
*Inks: Basic Black, Crumb Cake, and Real Red Classic Ink Pads, Real Red, Regal Rose, Blush Blossom, and River Rock markers
*Accessories: Tasteful Trim Bigz XL die, Candy Cane Button, Smooch Pearlized Accent Ink
Hope you like it.  Thanks for popping by for a visit!  Have a great day :) 

Ciao for now!

Tuesday, September 14, 2010

Trendy Classic Greeting Card Kids

So, I'm back with the 3rd card from the Greeting Card Kids stamp set.  I seem to have a school-girl crush on this set {wink!}.  For today's card,  I'm calling it trendy-classic, because it's my interpretation of a little modern take with a vintage image.  You can be the judge ;)  Since last week, I've been determined to make a card with each of the cute images from Greeting Card Kids.  Technically, this would be the last image of the set I haven't used yet, but it seems very appropo for Back To School time.  Here's a look at my full card.
So, what do you think?  I thought it was a fun look.  I think I still have the CB2 catalog on the brain.  The clean modern lines, and this color scheme have been quite a point of inspiration for me!  I love the ric rac with the scallops, and the angular lines are a good change up for me, too, I think.  Aren't these school kids so cute?  I think they're fun!  Here's the recipe for you:
{Trendy Classic Greeting Card Kids}
*Stamp Sets: Greeting Card Kids, Just Believe
*Cardstock: Basic Gray Textured, Whisper White, Poppy Parade, Baja Breeze
*Inks: Basic Black, Poppy Parade Classic Ink Pads; Baja Breeze, Poppy Parade, Blush Blossom, Crumb Cake, Daffodil Delight, Soft Suede, Basic Gray Markers
*Accessories: Tasteful Trim Bigz XL die, Scallop Squares Duo, Vintage Trinkets Brads
Here's a look at all the Greeting Card Kids stamp set (#120633, $15.95):

An adorable bunch, aren't they?  I have one more share...technically, I've already made a card using the cute little Valentine image {I made a birthday card for Laura at 2S4Y on this post here}, but stay tuned for another one :)

That's it for now!  Have a great day!

Monday, September 13, 2010

2S4Y Time!

This week's sketch for 2S4Y was a lot of fun to do.  I've been on a flower kick lately and again, I had created the flower first and then created the card to put it on afterwards...pretty backwards, huh?  Here's a look at the sketch - {I was excited to see that I'd have a spot to put my flower}: 
And here's a look at my full card:
I love this color combo - I was inspired to use this palette after perusing the CB2 catalog...they've got this gray/ poppy color scheme subliminally embedded in my head!  How fun are those daisy flowers from Starving Artistamps!  They are this week's sponsor at 2S4Y.  I double stamped them to create that silhouette look.  For some reason, this card reminds me of France - maybe because of the pretty poppy fields I remember seeing from the train when we had vacationed there.  It could also be that the words on the paper I used are in French! ;)  Oh, how I'd love to go back to Paris one of these days!

So how do you like my poppy flower?  I promise I will share a tutorial on how to make them.  For now, suffice it to say that they are made out of the modern label punch.  You'll see they are super easy to make, too.  Here's the recipe:
{Bunch o'daisies birthday wish}
*Stamp Set: Starving Artistamps, Occasional Quotes
*Cardstock: SU! Poppy Parade, Very Vanilla, Basic Gray, Presto Patterns Specialty DP
*Inks: SU! Basic Black, Poppy Parade Classic Ink Pads, Smooch Spray in Silver Foil
*Accessories: Extra Large Decorative Label Punch, Modern Label Punch, Tasteful Trim Bigz XL die, Silver waffle paper, Very Vanilla Seem Binding, Antique Brads
Whaddaya think?  Would love to hear from you! I also hope you'll come and play along with us at 2S4Y!  Have a great week!

Saturday, September 11, 2010

polka dot flower {Birthday Wishes}

Happy Saturday to you, blog friends!  I've had a productive morning so far - I ran 4 miles and then I got to play with my stamps!  Today, as I was blurfing, I was inspired to play in the Stamping411 challenge.  I had cut some dies out of the Circles Originals die the other day because I wanted to make one of those lollipop flowers, which seem to be all the rage right now - on purses, tops, shoes...you name it!  So, I created this flower, and it just so happened that it would work out for this sketch.  How do you like that little snippet of my card so far?  The flower is so fun! Plus, I love the Love Letter DSP..so pretty and romantic!  Here's what the sketch looks like:
And here's a full look at my card:

I used the Cherry Cobbler seem binding ribbon from the Holiday Mini.  I love the delicate texture - it makes such pretty bows too!  On this card, I had made a few bow loops, then I just tied the knot around the middle, and viola!  You've got a pretty full and loopy bow!  For the flower, I sponged the edges with Crumb Cake, then I misted each circle and crumpled them up into tiny balls.  After that, you unfold them and let them dry, the you layer them on top of each other until you get the flower look you like.  Finally, I secured it with one of the glimmer brads.  So easy and it makes such a statement!  Hope you like it.  Here's the recipe for you:
{Polka Dot Flower Birthday Wishes}
All supplies Stampin'Up!

*Stamp Set:  Occasional Quotes
*Cardstock: Very Vanilla, Love Letter DSP
*Inks: Crumb Cake, Basic Black
*Accessories: Circles 2 Originals die, Cherry Cobbler Seem Binding, Modern Label punch, Champagne Glimmer Brad, Corner Rounder punch
Hope you have a great weekend!  Thanks for coming by :)